

Under the People tab in the Unit, you can search for people in the Units and their subsidiary Units using the name, surname, member ID, a primary contact e-mail, or registration email. The display of persons in the lists depends, in addition to the user's permissions to the units, also on the system settings in the section: Administration/Settings/General:
-
Hide the People tab in Unit profile for people without a user role (Turn on the button to hide the People tab in the Unit for users without the User roles. Otherwise, the users without a User role see the People tab in the Unit)
- Hide the People tab in Unit profile for people without a user role (Turn on the button to allow users to see only members from the currently displayed Unit. Otherwise, users see people from the currently displayed Unit and its subsidiary Units.)

Filter people in the unit
From the list of displayed persons in the unit, it is possible to easily and quickly filter only selected persons according to the parameters:
- MEMBERSHIP STATUS (Member, None, Waiting) - allows you to filter people according to the current status of their registration.
- AGE GROUPS - the display of age groups depends on the age groups defined in the section: Administration/Membership/Age groups.
- ALLOCATION/MEMBERSHIP
- Primary allocation (Primary membership) - allows you to filter only people who have primary membership at the given unit level (does not include people who have primary membership in the subordinate units).
- Membership - allows you to filter people who have a membership (not primary membership) at the given unit level (does not include people who have primary membership or membership in the subordinate units).
- VOLUNTEERING - if the display of the "Volunteer" field is enabled in the section: Administration/Settings/Fields, a filter allows displaying persons who have the Volunteer status set in their profiles (in the list of persons - a blue heart symbol next to the name).

Adding a person to the Unit
Choose the Unit where you wish to add a new person:

In the People tab, click on „+“ in the upper-right corner.

A new window called ”New person” will appear. Fill in all required information marked by an asterisk (*) and click Continue.

Note: After filling in the membership start date, the system verifies the dates:
- Membership start date cannot be older (earlier) than the person's Date of birth.
- Membership start date cannot be older (earlier) than the Unit Formation Date.
After adding a person, you will be offered two options.
- To Send an electronic registration/invitation to the person you are adding
- Or To create a person's record manually

If a person has a lower age than specified in the "Minimum system age" parameter (Administration/Settings/System), 3 options for adding a person are displayed.

1. Send Electronic Invitation
Choose this option, if you want the person to fill in their personal and contact details by themselves.

Fill in the e-mail address of a new member in order to send them an electronic invitation. Choose if a new person should have an account in Tee-pee created by checking the check-box Invite to Tee-pee. This will expand their registration form with login and password fields, which they use to log in to Tee-pee. Click Send.
An automatic e-mail with a registration link will be sent to the person’s e-mail via which they can register and access the system.
In case you do not check the checkbox Invite to Tee-pee, an e-mail with a link to an electronic application form will be sent. A person can be invited to Tee-pee any time through their profile.

2. Create Person
Choose this option, if the main information about the new person (member) will be filled by the Administrator.
It is required to fill in all information marked with an asterisk (*). After filling in Personal Details, click Save Personal Details. In the Contacts tab, fill in contact details and click Save Contact Details.

3. Member registration and Legal Guardian invitation
Choose this option if you want the child's information to be filled in by a legal representative.
This option is available/displayed if the age of the created person is lower than the age specified in the: Administration/Settings /System/"Minimum system age" section.
After choosing this option, it is necessary to enter the email of the Legal Guardian - this email also becomes his registration email if he is also invited to the system.
After clicking "Continue", a check will be made to see if the given email already belongs to a person in the system.
- If the legal guardian's email is unique (it does not exist in the system as a registration email), a new Teepee account will be created for him:
- If the system found the match (the legal guardian's email is the same as the existing registration email in the system: the system will display the user with this registration email and the option to link this user's profile to the child's profile.
- If the Legal Representative email is found to exist in the system: the system will display the user with this registration email, but if the administrator does not want to link the child's profile to this account, it is possible to “Create a new Legal Representative” if the email is changed.
1. Legal guardian's email is unique
If this registration email is unique, the next step is to fill in the Name and Surname of the Legal Representative. If you want to invite a Legal guardian to the Tee-Pee system, check the "Invite legal guardian" option. In that case, the registration form will also contain a section for entering the login credentials (login and password) of the Legal guardian.
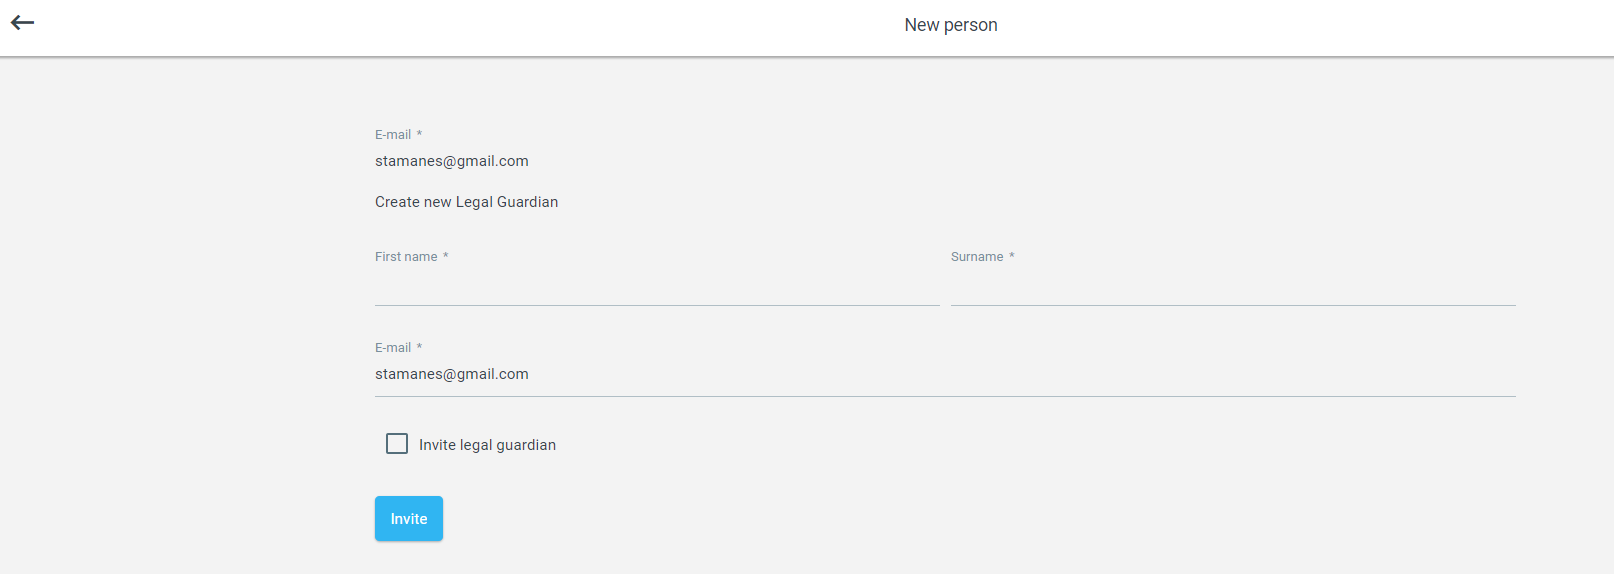
Data will be stored on the "Legal guardian" tab in the child's profile. A new profile for the legal guardian with selected tabs (Data, Contacts, Children, Settings) will be created.
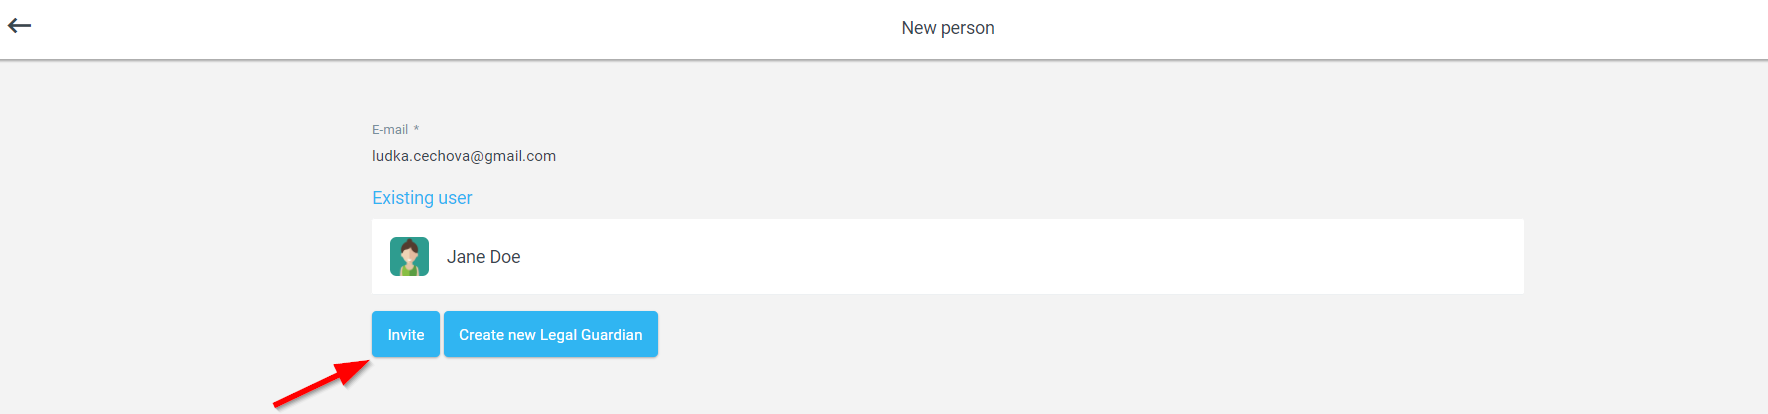
2. Legal guardian's email is the same as the existing registration email in the system
If the system found a match (the legal guardian's email exists in the system as a registration email, this person will be offered by the system. To select this person, click on Invite and the child's profile will automatically link to this person's profile (and with a teepee account).
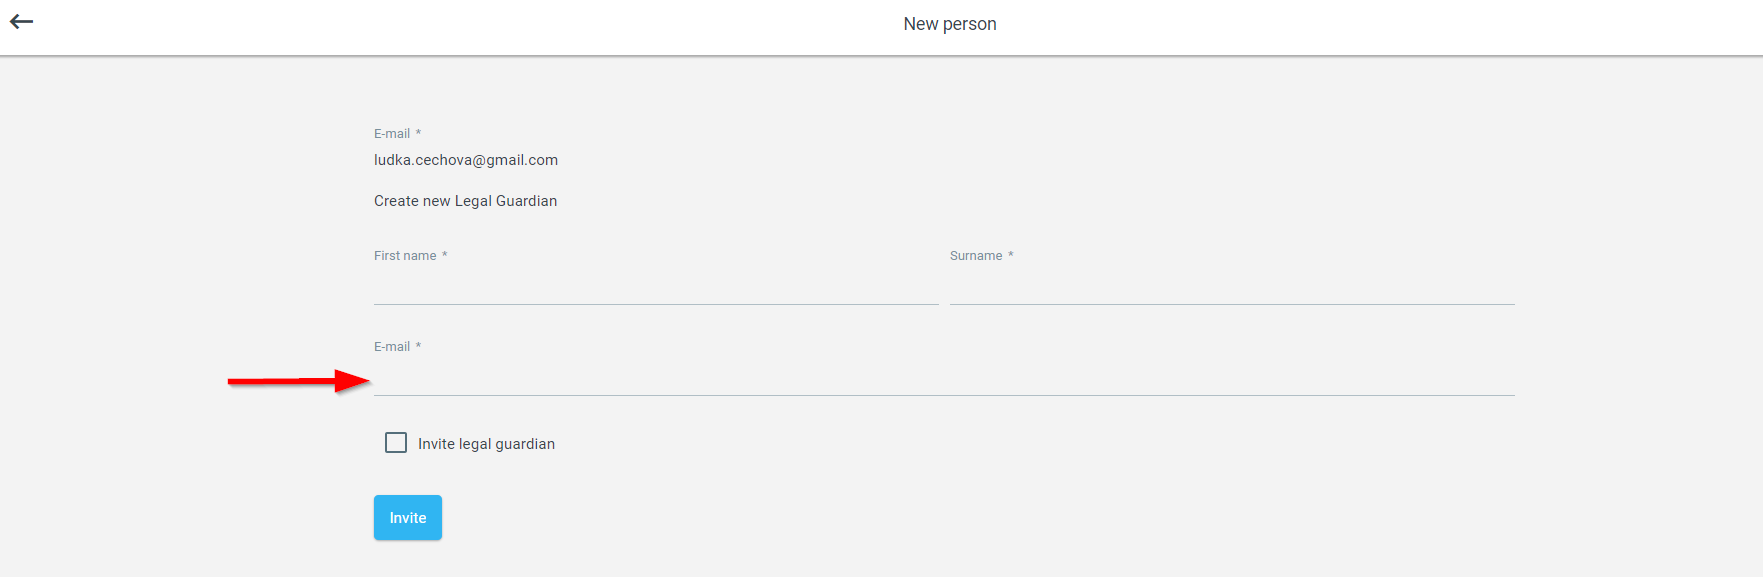
3. The email belongs to an existing person in the system, but it's not the one you want to choose.
If the Legal Representative email is found to exist in the system: the system will display the user with this registration email, but if the administrator does not want to link the child's profile to this account, it is possible to create a new legal guardian clicking "Create new Legal Guardian". It is necessary to enter a new unique registration email.

After creating a new child, you will be redirected automatically to the child's profile and new data will be created on the Legal guardian's tab.
Adding a new person - entering the data of a existing person in the system
When adding a new person to the unit, if the system finds a match in the Name, Surname and Date of birth with the existing person in the system at the same time in the entered data, it will automatically offer such a person for selection.
If it is an active person in the system - after selecting this person, the system will automatically create a new membership for the person.
If it is an inactive person in the system - after selecting, the system will offer the option to Restore a person. You can read more about the process and rules of restoring a person in the system in chap. Restoring a person.
Change of primary membership
It is possible to change of primary membership of a person only when this person has a primary membership (allocation) in the current Unit (a little house icon next to the person's name in the Unit People tab). The “Change primary membership” action is not possible if the person is only a member of some Unit but does not have a primary membership in it. A user can move a primary membership only to a Unit which:
- The unit type is eligible for people profile creation.
- And to which they have permissions to manage.
Once these conditions are met, then you can proceed to change primary membership a person to another Unit.
After performing the moving action, the system automatically terminates the primary membership in the ''old” Unit (to the date of moving minus one day) and creates a new primary membership in the ''new” Unit. The person's primary membership (allocation) will be then in this ''new” Unit.
Change of primary membership of one member:
Find a Unit from which you want to change of primary membership a person to another Unit. Primary membership is possible to move only into the active Unit.

In the People tab, choose a person whose primary membership you want to change. Click on the Individual Action button ''three dots”) on the right side of the person's record and choose an option Change primary membership.

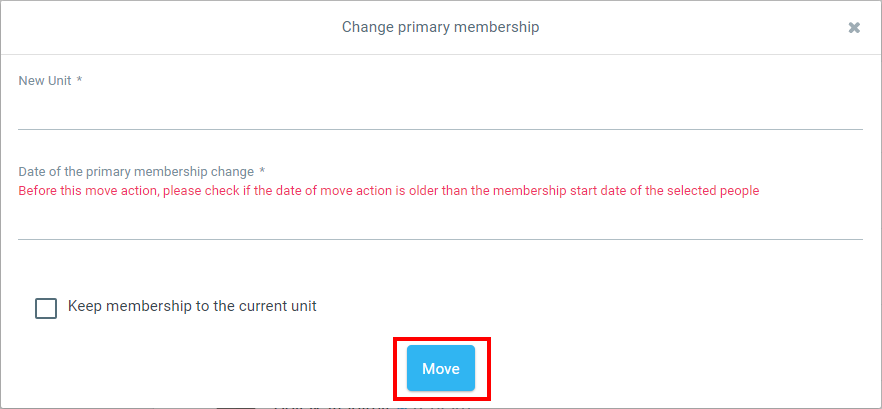
A new "Change primary membership" window will appear. Start typing the name of the new unit to which the selected person's primary membership will be moved and select the unit from the list. Choose a date to change your primary membership and decide if you want to keep membership to the current unit (the unit in which the person originally had primary membership).

If the user checks the "Keep membership to the current unit" checkbox, the record with the primary membership will end and the new membership record in the original unit will be created.
If the user does not check the "Keep membership to the current unit" checkbox, the system will automatically terminate the primary membership in the "original" unit without leaving the normal membership in the original unit.
After moving a primary membership, the system automatically terminates primary membership in the "original" unit and creates a new primary membership in the "new" unit.
Date of the primary membership change:
- The "Date of the primary membership change" cannot be set in the future.
- The "Date of the primary membership change" can not be older (earlier) than the "Formation date" of the Unit to which the primary membership is moved.
- The "Termination date" ("Valid till") of the primary membership in the original unit will be set to the date: "Date of change of primary membership change" minus one day.
- The "Termination date" ("Valid till") of the primary membership in the original unit must be later than the "Start date" of the primary membership in the original unit.
- The "Start date" of the primary membership in the new unit will be set as the "Date of change of primary membership change"
Change of primary membership of more members:
Moving of primary memberships of more members to another Unit is only possible when all these people have a primary membership in the Unit (a little house icon next to the person's name in the Unit People tab).

If you want to move more than one primary membership, select persons, by clicking the tick boxes next to their names. Then click on the bulk action button ''three dots”) on the top of the list and select an option Change primary membership.

A new window “Change primary membership” will appear. Start to write the name of the new Unit where a primary membership should be moved, select the Unit from the list and click Move.
After moving a primary membership, the system automatically terminates primary membership in the "original" unit and creates a new primary membership in the "new" unit.
Information about the Membership in the Units can be found in a person´s Profile in the Membership section.

Add an existing person into another Unit
The “Add into Another Unit” action will allow adding a person/member of the Unit to another unit while maintaining the original Unit's membership. This means that one person can be a member of more than one Unit within the Organisation. You would be able to add a person to another Unit only when the Unit is active.
It is possible to add a person to another Unit, only then the Unit type of this Unit is eligible for people creation, and you have permission to manage this Unit. If these conditions are met, navigate to the Unit that contains the person you want to add to another Unit.
Adding one person to another Unit
In the Unit's People tab select a person who you would like to add to another Unit. Click on the Individual Action button (''three dots”) on the right side of the person's record and choose an option Add into another unit.

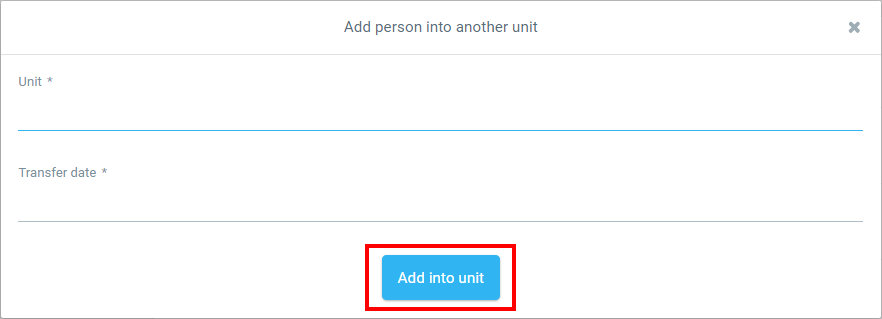
Fill in the Unit you want to add the person and the Transfer Date. Click Add into Unit to confirm. After confirmation, a person will be added to the new Unit. You can check the person's membership in the Units in the person's profile under the Membership tab.

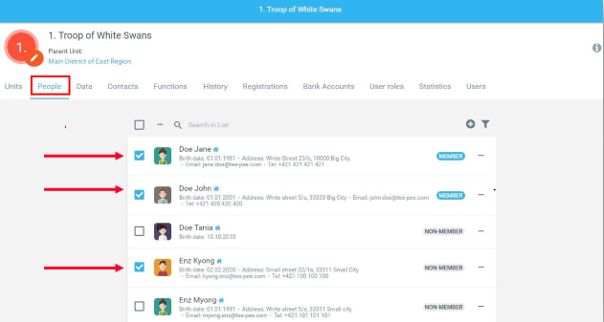
Adding more people to another Unit
If you want to add more than one person, select them by clicking the tick boxes next to their names. Then click on the Group Action button ''three dots”) on the top of the list and select an option Add into Another Unit.

Fill in the Unit you want to add the person(s) and the Transfer Date. Click Add into Unit to confirm. After confirmation, people will be added to the new Unit. You can check the person's membership in the Units in the person's profile under the Membership tab.
Terminating Person from the Unit
There are two ways on terminating a person and these are:
1) Terminating a person's membership in a Unit – this action concerns a person who is not allocated (does't have primary membership) in the Unit where you want to terminate a person's membership (the person doesn't have the little house icon next to their name). Terminating the membership in the selected Unit will terminate the Unit Membership, but the person´s Functions and User roles in this Unit will be kept. A person's membership in other Units will be kept with all the Functions and User roles.
The person will be still in “Active” status.


2) Terminating a person's membership on the Organisation level - this action concerns a person who is allocated (has primary membership) in the Unit where you want to terminate the membership (the person has the little house icon next to their name). Terminating the membership in the Unit where a person has primary membership means not only terminating it on the Unit level with all the Functions and User roles but also on the Organisation level in all the other Units this person is a member of.
To terminate a person's membership on the Organisation level is also possible to do from the person's Profile tab.
If the person had also Tee-Pee account, after termination it will be blocked.
A terminated person has in the Profile/Data tab filled a “Member to” field and has a new record in the Membership history in the Profile/Membership tab.


The terminate action is not available for the people who are showed in the list in People tab only because they are members of the Subunits of this Unit. If you want to terminate them, you need to go directly to the Unit they have membership in/are allocated in.

In case of membership termination in the Unit where a person has a primary membership, the system does not allow to add the termination date in the future (or current date). It is possible to enter only the date before the current date, or older.
In the text below we are describing the case when a person has primary membership in the Unit from where you want to terminate their Membership. In case 1. Terminating persons, the steps are the same but this person will not have a house icon next to their name.
Terminating membership of one person:
Find a Unit from which you want to end a person's membership.
In the Unit's People tab select a person who you would like to remove. Click on the Individual Action button ''three dots”) on the right side of the person's record and choose an option Terminate membership.

Terminating membership of more people:
Please note that when doing the Group Action, the people you are terminating the membership need to be either all not allocated in the Unit or all have an allocation in the Unit.
Find a Unit from which you want to end people's membership.
If you want to remove more than one person, select them by clicking the tick boxes next to their names. Then click on the Group Action button (''three dots”) on the top of the list and select the option Terminate Membership.


Fill in the termination date. The system does not allow to add the termination date in the future (or current date). The Membership of a person in the Unit will be terminated on this date. After this termination date, the person will no longer appear in the People tab of the Unit.
Click Confirm.
Assigning people's progress in bulk /people
Award, Qualification, Achievement, Rank, Service, and even Magazine can be added to more than one person at a time. The system will then automatically show added progress in people's Profile under related tabs (Awards, Qualifications, Achievements, Ranks, and Services).

Choose a Unit that contains the people which you want to give Award, Qualification, Achievement, or Magazine. In the People tab, select the people to which you want to add something. Click on the Group Action button ''three dots”) on the top of the list and select one of the options - Add Award/Add Qualification/Add Achievement/Add Magazine.